
When the device is not detected by Forte Checkout or Secure Web Pay application and the “Read Card” button is not displayed, ensure the terminal is
Powered on
Securely connected to the PC
Is in listening mode
NOTE: In Listening mode, tapping on the terminal’s home screen or pressing the green button on the terminal would not navigate to the Sale screen.
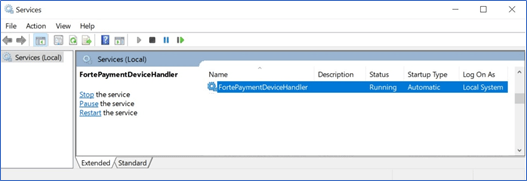
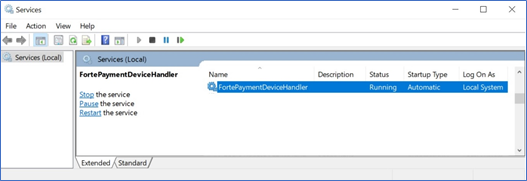
If this does not resolve the error, try starting/restarting the Device Handler from Windows Services.
Yes, the terminal should always be connected to the internet via either Ethernet or WiFi.
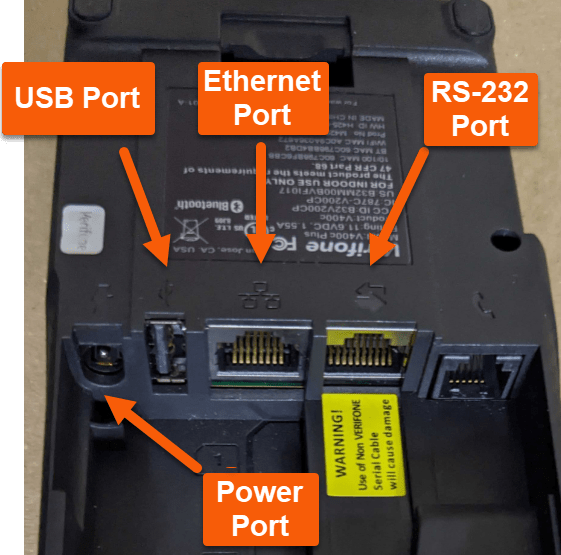
You will need the following to connect the V400c Plus to your PC:
Adapter: RS-232 male-to-Mini-USB female adapter
Cable: Mini-USB-to-USB cable
The following information should be provided to your IT Department:
Port 80 and 443 needs to be opened in the firewall.
The terminal uses the following URL/IP addresses:
Paymentsgateway.net 52.1.60.186
Terminals.forte.net 52.1.41.20
Terminals can be either DHCP or Static.
If your terminal doesn't wake up properly, check the following:
a. The terminal cables are plugged in securely.
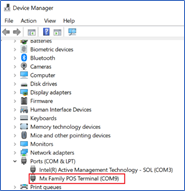
b. Required drivers are set up and are working properly.
c. Ensure communications is attempted over the right port and the port is not being used by any other programs.
d. The pg_merchant_id included in the transaction message is configured in the terminal.
e. The parameter Primary TXN comm link type (CDPTCT) is set correctly. NOTE: It should be set to 3 when connecting through WiFi and 2 when connecting through Ethernet.
f. If the items listed above are properly configured and the terminal is still not waking up, try rebooting the terminal.
This error indicates that the terminal does not have an internet connection. Make sure the device is connected to the internet.
To check if the device has an internet connection, complete the following steps:
Hit 1 – 5 – 9 at the same time.
From the listed modules, select Com Control
Select More > Diagnostics > Ping
Enter 008.008.008.008 for IP and select Continuous or Single.
If you get a success message, the terminal is connected to the internet.
The V400c Plus supports up to 10 locations/MIDs.
The V400c Plus passes a Source field that indicates if the transaction originated on a V400C Plus device. A separate Active Terminal Report will be created for V400c Plus devices.
No, the V400c requires a different adapter, but uses the same cable as the VX520 device. The adapter for the V400c Plus is an RS-232 male-to-Mini-USB female adapter.
To be able to use your V400c terminal in semi-hybrid mode you need to:
- Re-install the Device Handler. Refer to Setting up Device Handler section in this document.
- Connect your terminal via the USB cable to the computer.
You can change the status of your device in Dex from the Organizations or from the Locations menu.
To manage your terminal from the Organizations menu, you should:
- Click on Organizations
- Select the required Organization
- Click on Terminals box at the top of the page

- Select the required Terminal to edit it.
Click on Device Status to change the status to Active or Inactive.
Yes, you can set up up-to 10 locations on your terminal. However, if you are using the terminal in cloud mode, all the locations on the terminal should belong to the same organization.